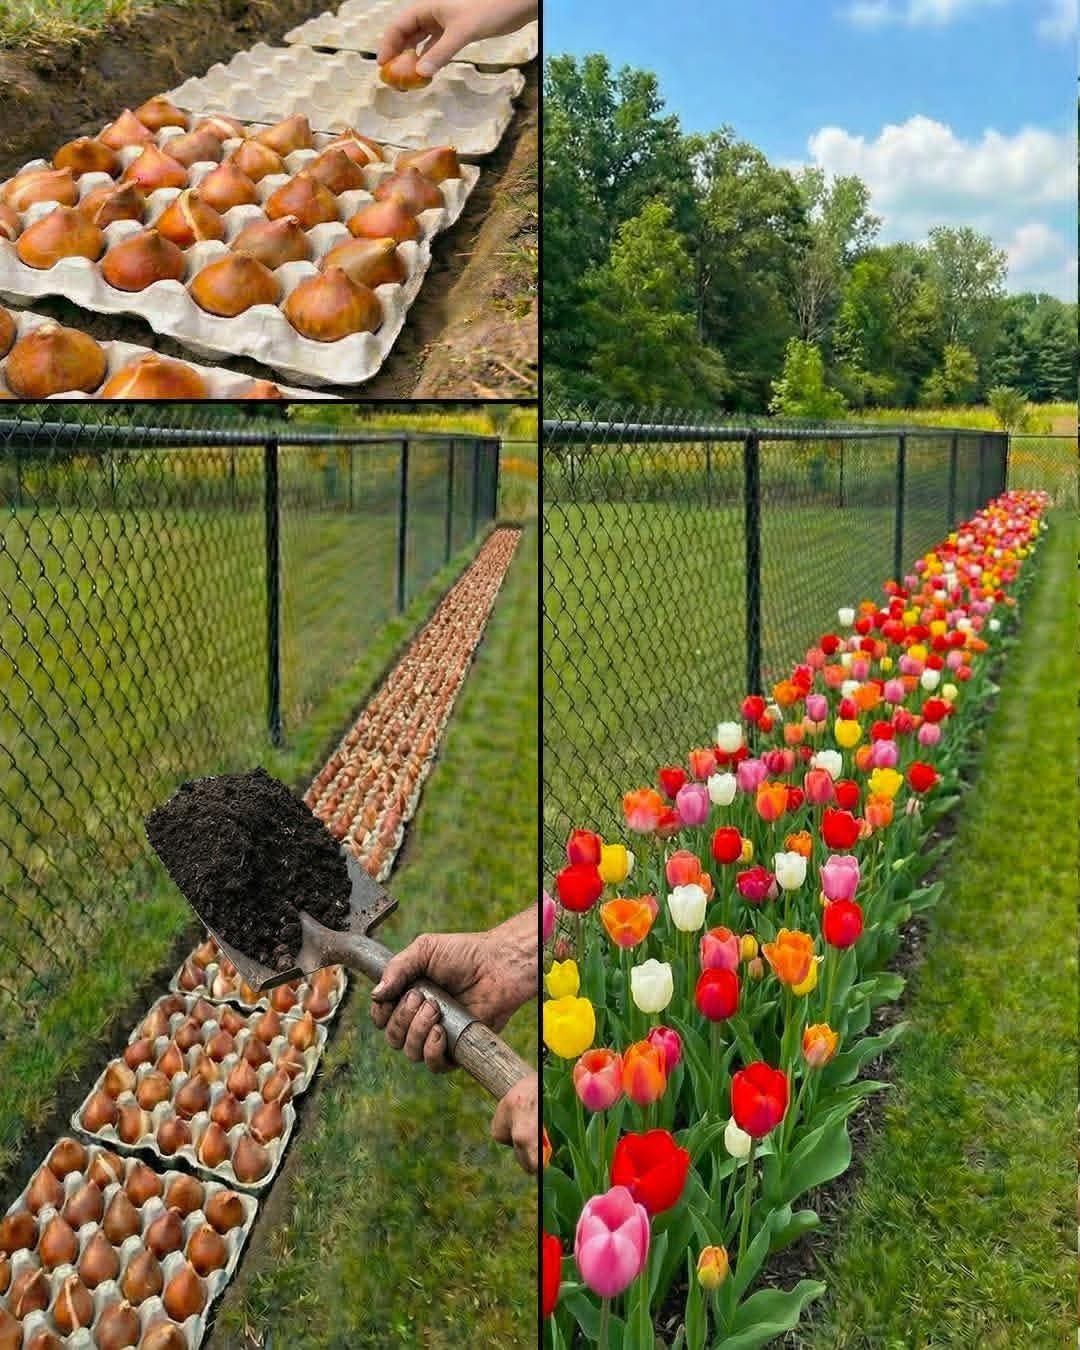
- Use cardboard egg cartons only (they decompose naturally)
- Leave them intact—no need to cut holes
- Place one bulb in each egg cup, pointed side up
The cartons will naturally break down in the soil while keeping bulbs evenly spaced.
Step 3: Dig a Long Trench
- Dig a trench about 6–8 inches deep (depending on bulb size)
- Make it long enough to fit all your egg cartons in a row
- Loosen the soil at the bottom for better root growth
This trench replaces digging individual holes—saving time and effort.
Step 4: Place the Egg Cartons in the Trench
- Lay the filled egg cartons flat inside the trench
- Place them end-to-end for a continuous row
- Ensure bulbs remain upright
The cartons act as a natural planting grid, keeping everything aligned.
Step 5: Add Compost or Soil
- Sprinkle a generous layer of compost or rich soil over the cartons
- This improves nutrients and helps bulbs establish strong roots
- Lightly press down to remove air pockets
Step 6: Cover and Level the Soil
- Fill the trench completely with soil
- Level the surface gently with your hands or shovel
- Do not compact too tightly—bulbs need airflow
Step 7: Water Thoroughly
- Water the area well after planting
- Moist soil helps start the rooting process
- Avoid overwatering; the soil should be damp, not soggy
🌼 What Happens Next?
- Egg cartons slowly decompose, enriching the soil
- Bulbs grow evenly spaced and upright
- In spring, you’ll get a beautiful, full row of flowers just like in the image
✅ Benefits of This Method
- ✔️ Perfect spacing without measuring
- ✔️ Faster than planting bulbs one by one
- ✔️ Eco-friendly and zero waste
- ✔️ Ideal for long borders and fences
- ✔️ Beginner-friendly
🌸 Final Tip
This method works best when planting bulbs in fall, allowing them to establish roots before winter. Come spring, you’ll be rewarded with a stunning, colorful display that looks professionally planted—with very little effort.