Step 1: Activate the Yeast
- In a large mixing bowl, dissolve the yeast and 1 tablespoon of the sugar in warm water. Let it sit for about 5 to 10 minutes, or until the mixture becomes frothy and bubbly. This indicates that the yeast is active and ready to use.
Step 2: Make the Dough
- To the yeast mixture, add the remaining sugar, oil, 2 cups of flour, and salt. Stir well until combined. Gradually add the remaining flour, a half cup at a time, until a soft dough forms.
- Turn the dough out onto a floured surface and knead it for about 8 to 10 minutes, adding more flour as necessary to prevent sticking, until the dough is smooth and elastic.
Step 3: First Rise
- Place the dough in a greased bowl, turning once to grease the top. Cover the bowl with a clean kitchen towel and let the dough rise in a warm, draft-free place for about 1 hour, or until it has doubled in size.
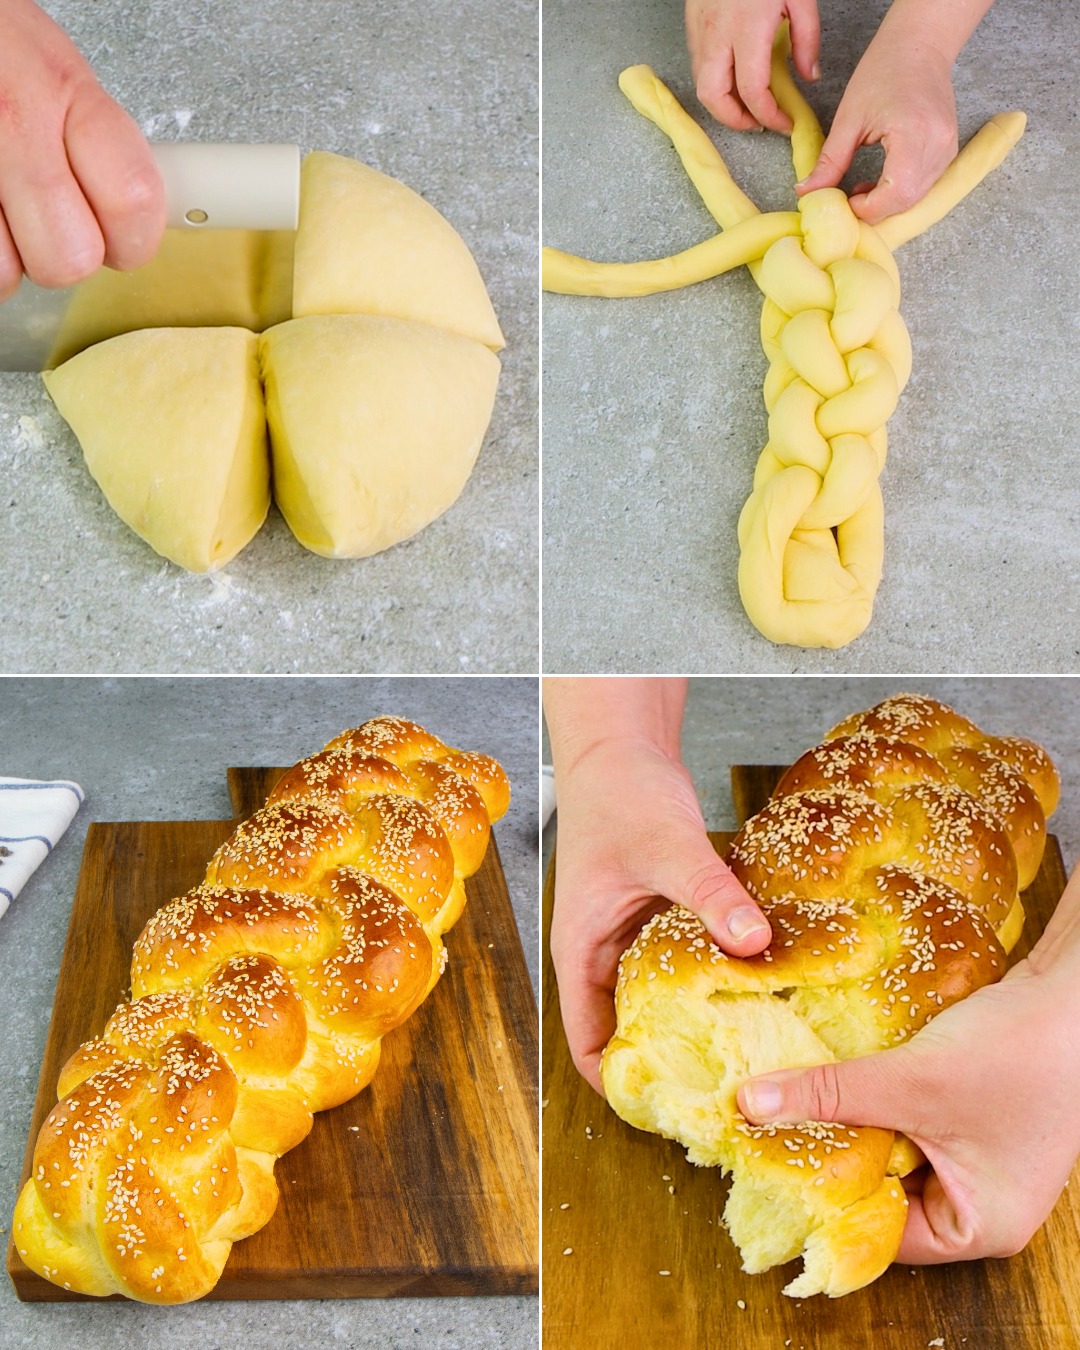
Step 4: Shape the Bread
- Punch down the dough to release any air bubbles, then turn it out onto a lightly floured surface.
- Divide the dough into three equal pieces. Roll each piece into a long rope, about 14 inches long.
- Lay the ropes side by side and pinch them together at one end to secure them. Braid the ropes together, and then pinch the ends to seal. Tuck both ends under slightly to create a neat look.
Step 5: Second Rise
- Transfer the braided loaf to a baking sheet lined with parchment paper. Cover it with the kitchen towel again and let it rise for another 30 minutes, or until it has puffed up slightly.
Step 6: Bake the Bread
- Preheat your oven to 375°F (190°C).
- Gently brush the top of the risen loaf with the beaten egg to create a shiny, golden crust.
- Bake in the preheated oven for about 25 to 30 minutes, or until the bread is golden brown and sounds hollow when tapped on the bottom.
Step 7: Cool and Serve
- Remove the bread from the oven and let it cool on a wire rack for at least 20 minutes before slicing. This allows the bread’s structure to set and makes it easier to slice.
Tips:
- Yeast Temperature: Ensure the water is at the right temperature to activate the yeast. Too hot, and it will kill the yeast; too cold, and the yeast won’t activate.
- Kneading: Proper kneading is crucial for gluten development, which gives the bread its structure and texture. If the dough is too sticky to handle, add flour a tablespoon at a time until it’s manageable.
- Braiding: If you’re new to braiding, it may help to practice with strings or ribbons first. The principle is the same, and it’s simpler than it might seem!
Enjoy your beautiful homemade braided bread as a side to your meals, for sandwiches, or simply with a bit of butter and jam for a delicious treat. This versatile bread not only tastes great but also adds an elegant touch to your baking repertoire.